An audio interface is a device that connects your computer to other audio equipment, such as microphones, instruments, and speakers. It's essentially an external sound card that provides high-quality audio inputs and outputs for your computer.
This will be what takes that analogue signal from your microphone or whatever audio signal you feed it and turn it into a digital signal that your computer can use for recording.
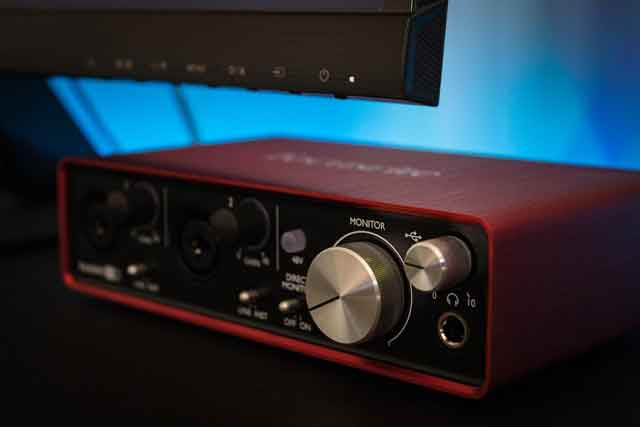
This is the second most important piece of hardware you will be investing in. There are fantastic options now a days that can be had for very reasonable prices.
When picking out an Audio interface one thing you should consider is how many separate inputs you will want to track at once.
If you are only needing one input at a time for instance if you are a pod caster or vlogger and just need one microphone, then a one channel interface should be fine for your needs.
I would at least invest in a 2-channel interface at the minimum though. A 2-channel interface will allow you to record a stereo signal or 2 independent inputs. This could be a guitar and vocal mic simultaneously if you are a songwriter, or a stereo signal from a variety of sources.
Most computers have built-in audio hardware, but these typically have lower quality and limited inputs and outputs. An audio interface allows you to connect professional-quality microphones, instruments, and speakers to your computer, giving you greater flexibility and control over your audio recordings.
Types of Audio Interfaces
There are several types of audio interfaces, including:
Using an audio interface is relatively straightforward. Here are the basic steps:
Here are some tips for using an audio interface effectively:
A really good simple Audio interface to start out with is the Focusrite Scarlett. These can be found for very reasonable prices at many retailers and comes in many versions with a different amount of inputs and outputs to pick from.
If you are wanting more inputs than just two channels you could invest in a multichannel mixer and feed an output of that signal into your 2-channel interface for recording more than two microphones at once.
The downside to recording in this fashion is you must make sure your mix is perfect on your mixer because you will not be able to adjust your levels independently after recording. You will only have the stereo output of your mixer to adjust.
This is a much cheaper alternative than a multichannel interface however and if you are just wanting some good demos of your band this will be the cheapest route to take.
Starting out I would suggest just investing in a 2 channel interface with good pre-amps. If down the road you decide you need more independent control of your tracks after recording then that’s when I would invest in a multichannel interface.
I will discuss those in another section but good ones to look at include the Presonus studiolive and the Behringer X32 or XR18.
After you have your computer and audio interface setup the next step is getting some sounds into in your computer to record. In order to do that you will need a microphone.